What Makes Reel Fore-Aft Cylinder Replacement Hard in Tight Space?
Tight space makes reel fore-aft replacement hard because it restricts the physical swing room for tools, obscures the technician’s line of sight to mounting pins, and complicates the alignment of heavy components within the narrow header frame. You are in the middle of a high-stakes harvest when the reel stops responding, and you realize a reel fore-aft cylinder replacement is the only way to save the day. The agonizing reality of having only two inches of clearance to loosen a seized hydraulic fitting can turn a standard repair into a logistical nightmare. By understanding these spatial constraints and utilizing professional-grade strategies, you can overcome these hurdles and minimize your equipment downtime.

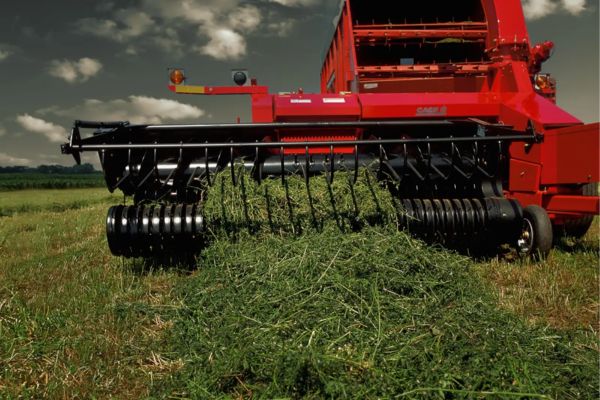
Why Is Limited Clearance The Primary Challenge?
Limited clearance is the primary challenge because it prevents you from using standard impact wrenches or large pry bars during a reel fore-aft cylinder replacement. Most agricultural headers are designed for aerodynamic efficiency and crop flow, which often results in the hydraulic mounting points being tucked deep inside the structural steel.
Identifying Structural Obstacles
The steel gussets and support beams that provide the header with its strength are the very things that get in your way. You will often find that the cylinder is sandwiched between the main frame and the reel arm, leaving no room for your hands and a tool simultaneously.
- Main header frame protrusions.
- Reel arm pivot housings.
- Cross-member bracing.
Think about it. Every inch of steel you have to work around increases the risk of knuckle injuries and tool slippage.
The Cost Of Improper Access
When you cannot reach the cylinder comfortably, you are more likely to take shortcuts that result in damaged parts. Attempting to “angle” a wrench because of limited space often leads to rounded bolt heads or stripped hydraulic threads that are nearly impossible to fix in the field.
- Rounded hex nuts on fittings.
- Scratched rod surfaces from tool contact.
- Damaged electrical harnesses nearby.
But there is more. A simple repair that should take an hour can stretch into four if you cannot gain clear access to the primary mounting hardware.
Ensuring you have identified every structural obstacle before you begin allows you to select the correct approach, saving you hours of frustration and preventing costly secondary damage to your header components.
| Obstacle Type | Impact on Repair | Recommended Mitigation | |
|---|---|---|---|
| Narrow Frame Gaps | Restricts wrench swing | Use high-tooth count ratchets | |
| Overlapping Brackets | Obscures mounting pins | Remove secondary covers first | |
| Proximity to Lines | Risk of hose pinching | Bundle and move hoses aside |
What Tools Are Best For Restricted Access?
Using low-profile, high-torque tools is the best way to navigate a reel fore-aft cylinder replacement when you have less than three inches of operational room. Standard tools are simply too bulky for the recessed pockets where these cylinders reside.
Selecting Flare Nut Wrenches
Flare nut wrenches are essential because they grip more sides of the hydraulic fitting than a standard open-end wrench. In tight spaces, you cannot afford for the wrench to slip and round off the nut.
- 6-point contact for maximum grip.
- Offset handles for better reach.
- Polished finishes for easy cleanup.
Here is the kicker: a single slip in a confined space can end your repair before it even starts.
Using Magnetic Support Tools
Magnetic parts trays and telescopic pickup tools are life-savers when you are working in areas where you cannot see where a dropped bolt might land. If a mounting pin clip falls into the header frame, you could spend hours fishing it out.
- Flexible magnetic wands.
- LED-equipped pickup tools.
- Heavy-duty magnetic parts bowls.
Believe it or not. Small tools designed for visibility and retrieval are just as important as the wrenches themselves in these cramped environments.
By investing in specialized low-profile tools, you ensure that you can apply the necessary torque to hydraulic fittings without damaging the hardware, keeping your repair timeline on track.
| Tool Category | Specific Application | Space-Saving Benefit | |
|---|---|---|---|
| Stubby Wrenches | Tightening fittings | Allows for 30-degree turns in gaps | |
| Crowfoot Wrenches | Accessing hidden nuts | Reaches behind frame members | |
| Slim-Line LEDs | Illuminating pockets | Fits into gaps where flashlights won’t |
How Do You Safely Neutralize The System?
You neutralize the system by fully depressurizing the hydraulic lines and mechanically locking the reel arms before starting a reel fore-aft cylinder replacement. Working in a “crush zone” without proper safety protocols is extremely dangerous because a sudden loss of pressure can cause the heavy reel to drop.
Relieving Residual Pressure
Residual pressure can remain in the lines even after the engine is turned off. You must cycle the hydraulic controls with the engine off to ensure the fluid is not under tension when you crack the fittings.
- Cycle cab controls multiple times.
- Check for “dead” feel in the joystick.
- Use a pressure gauge if available.
Look at it this way. A high-pressure pinhole leak can penetrate skin, making depressurization your most critical safety step.
Securing The Header Frame
Since you will be removing the cylinder that holds the reel in place, you must use mechanical stands or wooden blocks to prevent the reel from shifting. In tight spaces, there is no room to jump out of the way if the machinery moves.
- Heavy-duty jack stands.
- Custom-cut wooden blocks.
- Cylinder safety locks.
The best part? Once the reel is physically blocked, you can work with the confidence that the components won’t move while your hands are in the gap.
Properly securing and depressurizing the system eliminates the risk of catastrophic injury or equipment damage, providing you with a stable and safe environment to perform the replacement.
| Safety Step | Action Required | Risk Avoided | |
|---|---|---|---|
| Pressure Relief | Actuate valves with engine off | Fluid injection injury | |
| Mechanical Blocking | Insert blocks under reel arms | Physical crushing/trapping | |
| Tag-Out | Remove ignition key | Accidental system start-up |
Which Steps Ensure A Clean Disconnection?
A clean disconnection involves labeling every line and plugging the ports immediately during the reel fore-aft cylinder replacement to prevent dirt from entering the sensitive hydraulic system. Contamination is the leading cause of premature pump failure, and tight spaces make it easy for debris to fall into open lines.
Labeling Hydraulic Lines
In the dark, cramped quarters of a header frame, it is very easy to mix up the “extend” and “retract” hoses. Using color-coded tape or numbered tags ensures that you hook everything back up correctly the first time.
- UV-resistant cable ties.
- Permanent marker on hose wraps.
- Digital photos for reference.
Make no mistake. Reversing the lines will cause the reel to move in the opposite direction of your control input, which can be dangerous during operation.
Managing Fluid Spillage
Tight spaces make it difficult to place a drain pan under the cylinder. You should use absorbent pads tucked into the frame to catch any escaping oil and prevent it from making the work area slippery.
- Heavy-duty oil absorbent mats.
- Vacuum-seal hose plugs.
- Threaded metal caps for ports.
But there is more. Keeping the area clean allows you to see the threads and seals more clearly, reducing the chance of an installation error.
By meticulously labeling and sealing your hydraulic connections, you prevent system contamination and ensure the reel functions exactly as intended once the new cylinder is installed.
| Disconnection Task | Method | Tool Needed | |
|---|---|---|---|
| Hose Identification | Color-coding or tagging | Zip ties/Markers | |
| Fluid Containment | Plugging open ports | Steel or plastic plugs | |
| Area Preparation | Cleaning around fittings | Brake cleaner/Rags |
How Does Alignment Affect Installation Success?
Proper alignment ensures that the mounting pins slide through the bushings without force, which is the most difficult stage of a reel fore-aft cylinder replacement when you cannot see both sides of the unit. Side-loading a cylinder during installation will cause the seals to fail almost immediately.
Centering The Pivot Pins
You must align the cylinder “eye” perfectly with the frame brackets. Because you have limited room to maneuver, you may need to use a tapered drift punch to help pull the components into alignment.
- Use of tapered alignment tools.
- Checking for “ovaling” in frame holes.
- Greasing the pins for easier insertion.
Here is the kicker: forcing a pin with a hammer usually means something is misaligned and will cause wear later.
Avoiding Rod Seal Damage
As you slide the new cylinder into the tight slot, the chrome rod is vulnerable to being scratched by the sharp edges of the header frame. Any nick in the rod surface will tear the new seals as the cylinder cycles.
- Wrap the rod in protective plastic.
- Keep the protective shipping cap on.
- Guide the rod with a second person.
Let’s dive deeper. The rod’s surface finish is measured in microns; even a small scratch can lead to a persistent leak.
Achieving perfect alignment during installation prevents side-load stress on the cylinder, ensuring that your new component provides a long service life without leaking.
| Alignment Factor | Technical Requirement | Result of Failure | |
|---|---|---|---|
| Pin Parallelism | Must be 100% square | Rapid bushing wear | |
| Rod Clearance | No contact with frame | Gouged rod/leaking seals | |
| Bushing Fit | Snug but not forced | Vibration and noise |
Can Maintenance Prevent Future Space Issues?
Maintenance prevents future space issues by keeping the mounting environment clean and lubricated, making the next reel fore-aft cylinder replacement much easier to perform. If you allow the pivot pins to rust into the frame, you will have to use heat or heavy hammers, which is impossible in a tight header slot.
Inspecting Pin Wear
You should regularly inspect the pivot pins for signs of “ovaling” or scoring. Replacing a worn pin during a routine service is much easier than trying to extract a seized one during a breakdown.
- Check for play in the bushings.
- Apply high-pressure grease.
- Look for rust streaks from joints.
Think about it. A little grease now prevents a major extraction headache three seasons down the road.
Monitoring Fluid Quality
Contaminated fluid is the primary reason cylinders fail in the first place. By changing filters and monitoring for water or metal shavings, you can extend the life of your reel cylinders significantly.
- Regular fluid sampling.
- Checking breather caps for clogs.
- Using the correct ISO grade oil.
Believe it or not. Clean oil is the cheapest “insurance policy” you can buy for your hydraulic system.
A proactive maintenance schedule reduces the frequency of difficult repairs and ensures that when you do have to work in tight spaces, the hardware is in good condition and easy to disassemble.
| Maintenance Task | Frequency | Benefit | |
|---|---|---|---|
| Grease Pivot Pins | Every 50 hours | Prevents pin seizure | |
| Inspect Rod Surface | Daily (during harvest) | Protects rod seals | |
| Fluid/Filter Change | Annually | Prevents valve/seal erosion |
Where Should You Source Replacement Units?
You should source replacement units from a supplier that offers precision-engineered components designed to meet or exceed OEM specifications for a reel fore-aft cylinder replacement . When space is tight, you cannot afford to waste time trying to “make a part fit” that isn’t exactly the right size.
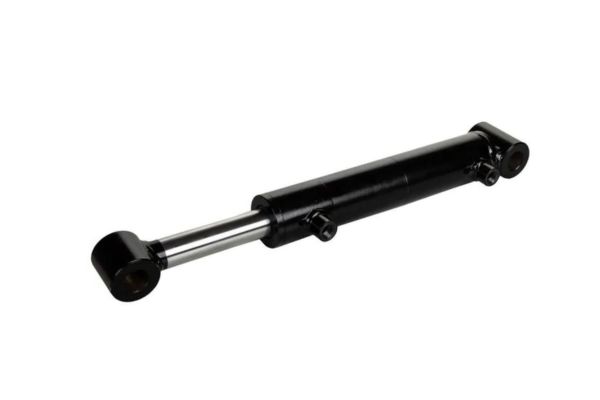
Evaluating Build Quality
The quality of the welds and the finish on the cylinder barrel determine how long the part will last in the field. Look for cylinders that feature induction-hardened chrome rods, as these are much more resistant to the nicks and scratches common in agricultural work.
- Induction-hardened rods.
- High-spec polyurethane seals.
- Precision-machined end caps.
Make no mistake. A cheap aftermarket cylinder will often cost you more in downtime than you saved on the purchase price.
Seeking Custom Engineering
If your machinery has been modified or if you are dealing with a unique header configuration, a standard off-the-shelf part may not work. In these cases, sourcing a custom-built cylinder ensures that the ports and mounting eyes are perfectly positioned for your specific space constraints.
- Port orientation customization.
- Specific stroke length matching.
- Bore size optimization.
The best part? A custom-fit cylinder drops right into place, eliminating the need to reroute hoses or modify the header frame.
Choosing a high-quality, precision-fit cylinder simplifies the installation process and provides the long-term durability needed to withstand the rigors of the harvest season.
| Sourcing Factor | Importance | Advantage | |
|---|---|---|---|
| Dimensional Accuracy | Critical | Direct drop-in installation | |
| Seal Material Grade | High | Resists heat and pressure spikes | |
| Rod Hardness | High | Prevents scratches in tight gaps |
Conclusion
Successfully navigating a reel fore-aft cylinder replacement requires more than just mechanical skill; it demands a strategic understanding of how to work within the confines of modern agricultural machinery. We have explored how restricted access impacts everything from tool selection to the critical post-installation testing needed to ensure field readiness. By prioritizing safety, using the right low-profile tools, and sourcing high-quality replacement units, you can turn a frustrating repair into a successful maintenance milestone.
Our goal is to provide the engineering expertise and durable components that keep your operations running smoothly, even in the most demanding conditions. If you are facing a difficult repair or need a cylinder that fits your specific spatial needs, contact us today to find the perfect solution for your equipment.
FAQ
Can I use a standard crescent wrench for this repair?
No. A crescent wrench is too bulky for tight spaces and prone to slipping, which will round off your hydraulic fittings and make the repair much harder.
What’s the best way to see into the header frame?
The best way is to use a combination of a high-lumen magnetic LED penlight and a telescopic inspection mirror to view the “blind” side of the cylinder.
How do I know if the cylinder is side-loading?
If you notice the rod rubbing against one side of the gland nut or if the cylinder makes a “groaning” sound during movement, it is likely misaligned.
Can I replace just the seals instead of the whole cylinder?
Yes, but in tight spaces, the time and labor required to remove, rebuild, and reinstall the unit often make a full cylinder replacement more cost-effective.
What’s the best way to prevent the reel from falling?
The best way is to use mechanical safety stops or precisely cut wooden blocks placed between the reel arm and the frame to provide a solid physical barrier.