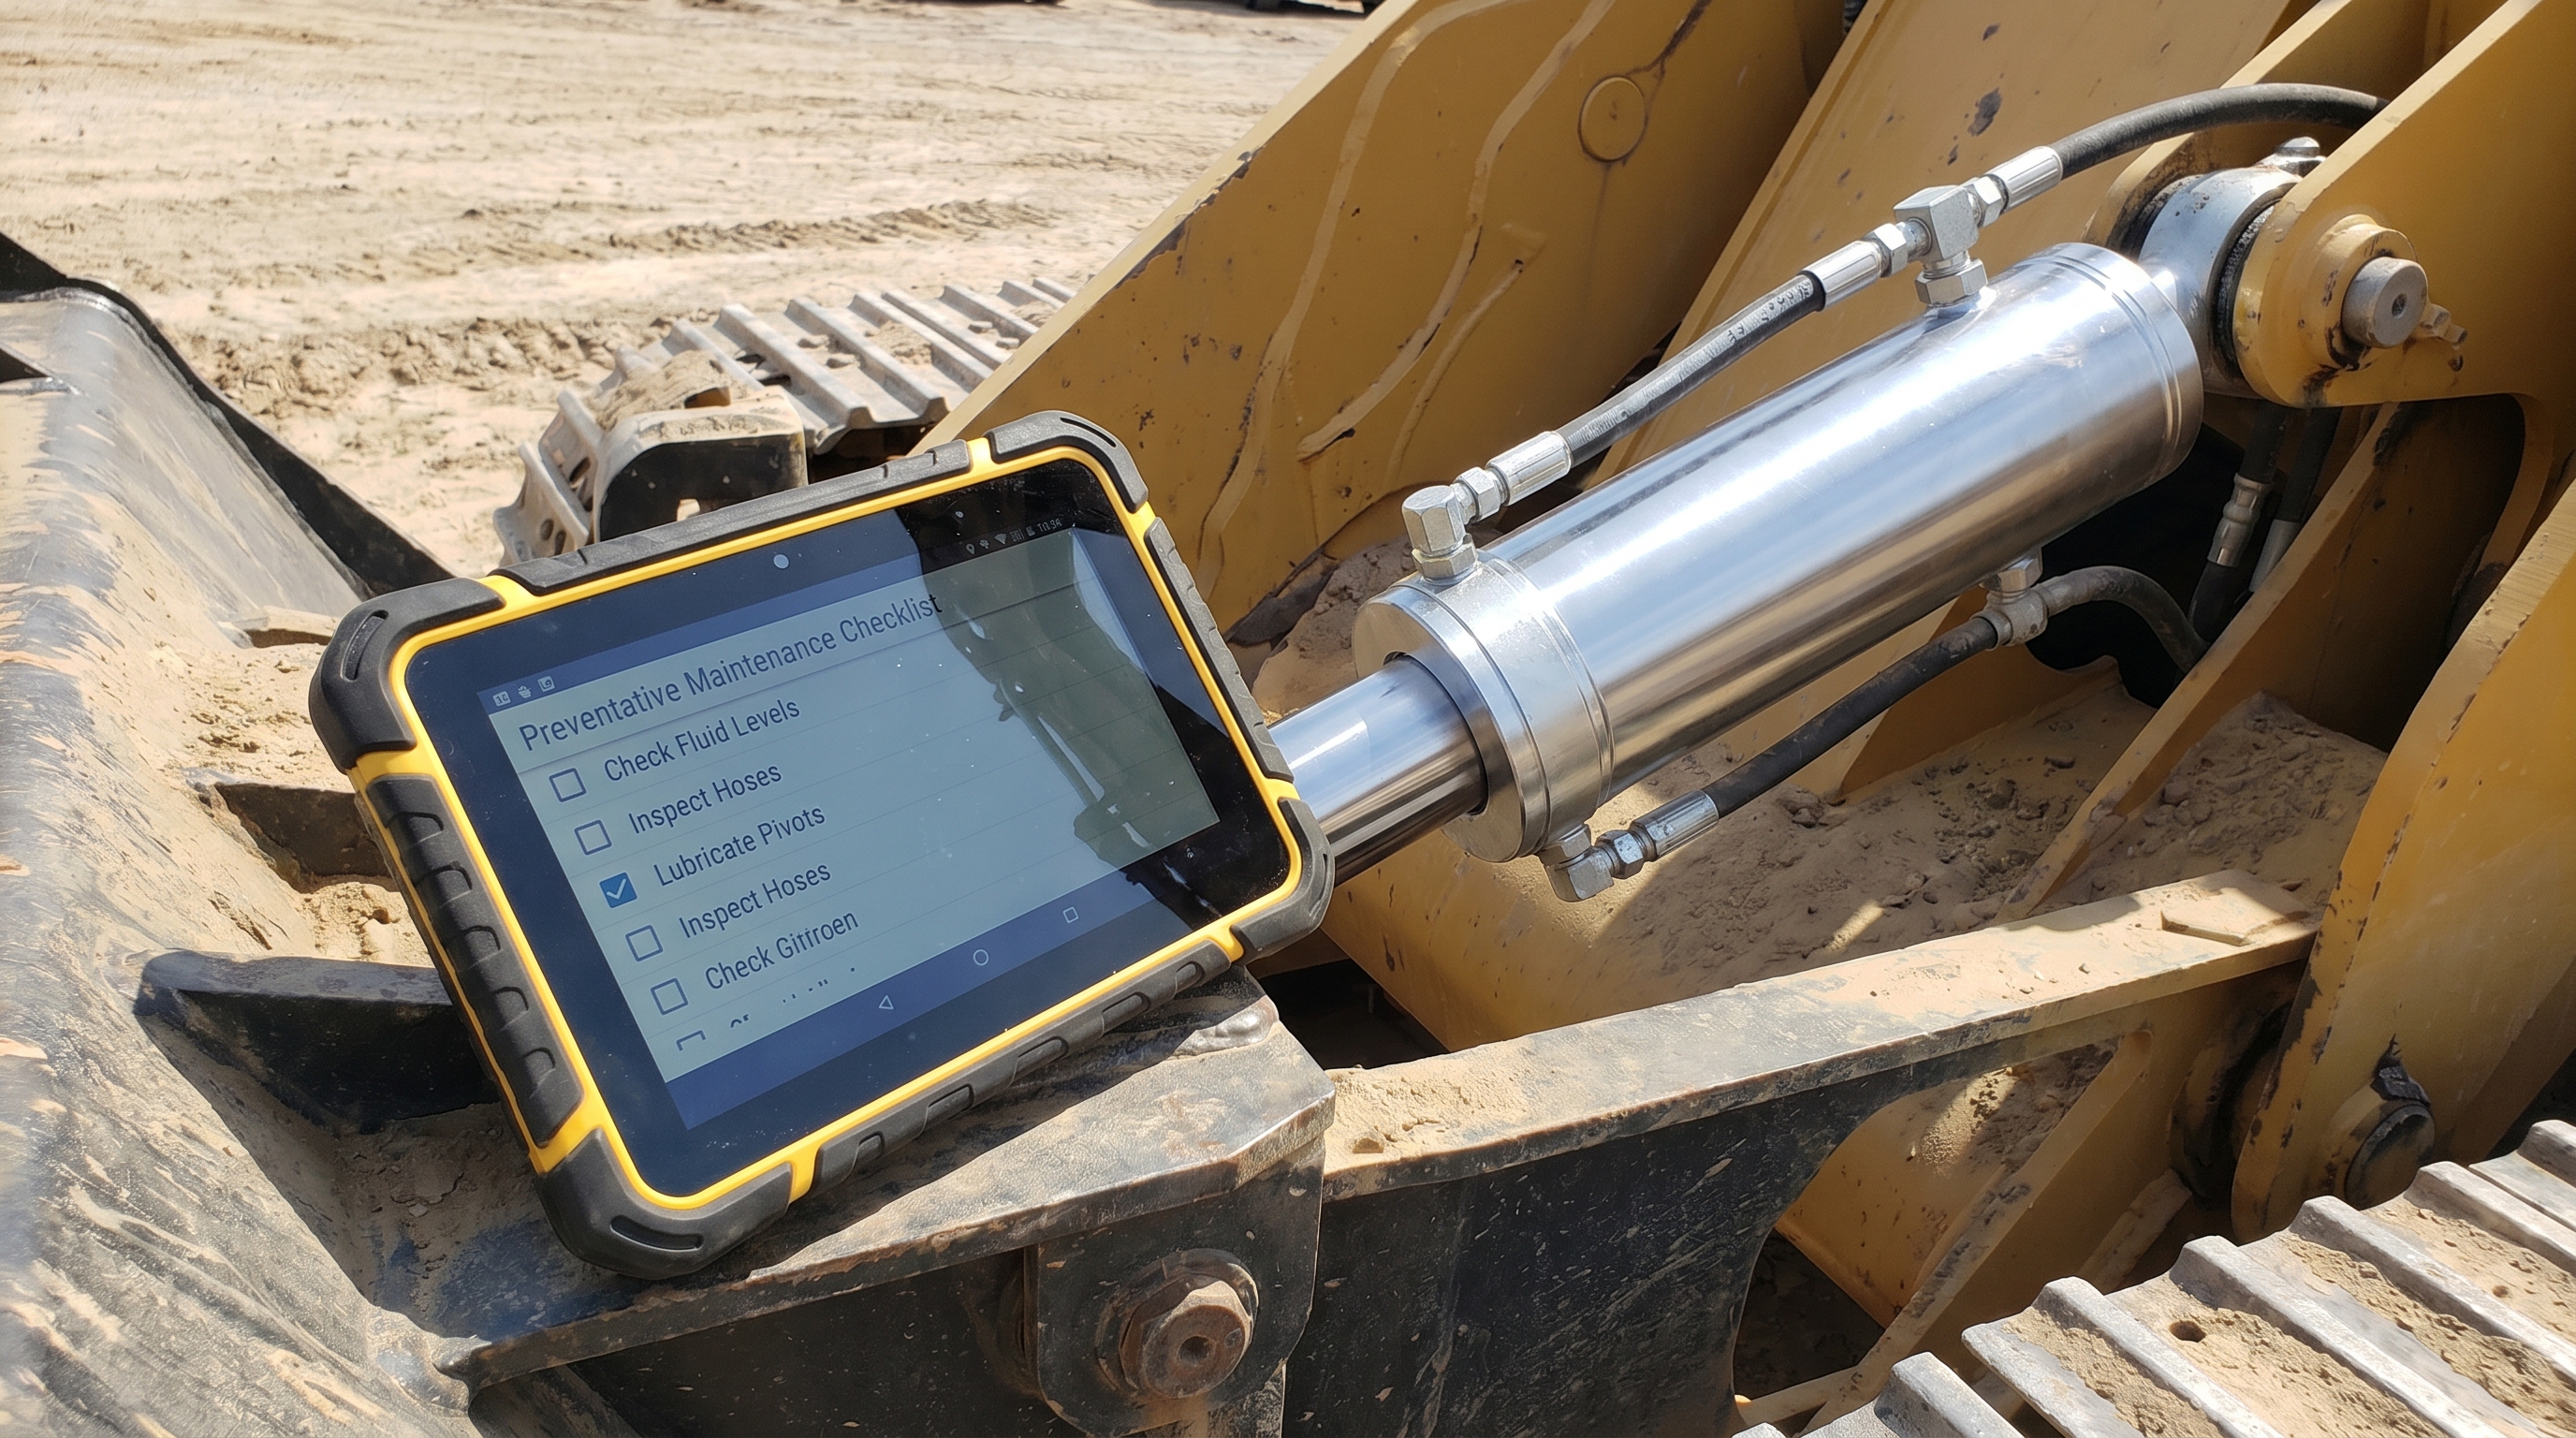
How to Use a Hydraulic Cylinder Test for Preventative Maintenance
Unexpected equipment downtime is the primary profit-killer in heavy-duty industrial operations. If you operate 50-ton excavators or high-cycle manufacturing presses, a single seal failure can lead to catastrophic oil contamination, bent rods, and thousands of dollars in lost production time. The reality is that most hydraulic failures don’t happen instantly; they begin as minute internal bypasses or micro-fissures in the rod plating. By implementing a systematic hydraulic cylinder test protocol, you can identify these sub-surface issues before they evolve into total system failures.
Why Implement a Hydraulic Cylinder Test Routine?
Reducing Operational Expenditure Through Data
The cost of a proactive inspection is a fraction of the cost of an emergency rebuild. When you use a digital checklist to track cylinder performance over time, you create a predictive model that tells you exactly when a component is nearing its end-of-life.
- Direct Labor Savings: Technicians spend less time on “reactive” firefighting.
- Parts Optimization: You only replace seals when data indicates wear, not on an arbitrary schedule.
- Fluid Longevity: Detecting internal leaks early prevents oil overheating and oxidation.
Enhancing Workplace Safety Standards
A failing cylinder is a pressurized bomb waiting to drop its load. If you are managing lifting equipment or heavy agricultural machinery, a sudden loss of pressure can cause uncommanded movement that endangers operators.
Safety isn’t just about hard hats; it’s about the structural integrity of the fluid power that holds your machines together. A regular hydraulic cylinder test ensures that your load-holding valves and piston seals are capable of maintaining their rated capacity.
- Zero-Drop Integrity: Ensures lifting arms don’t settle or drift during operation.
- Structural Verification: Identifies cracks in mounting eyes or clevises before they shear.
- Regulatory Compliance: Helps meet OSHA and ISO standards for machine safety.
Extending the Service Life of Auxiliary Components
Your cylinders do not exist in a vacuum. When a cylinder has an internal leak, the pump has to work twice as hard to maintain the required pressure, leading to cavitation and premature pump failure.
- Heat Reduction: Efficient cylinders generate less friction-induced heat in the reservoir.
- Pump Protection: Maintains the volumetric efficiency of the hydraulic power unit.
- Hose Integrity: Prevents pressure spikes that cause hydraulic hoses to burst.
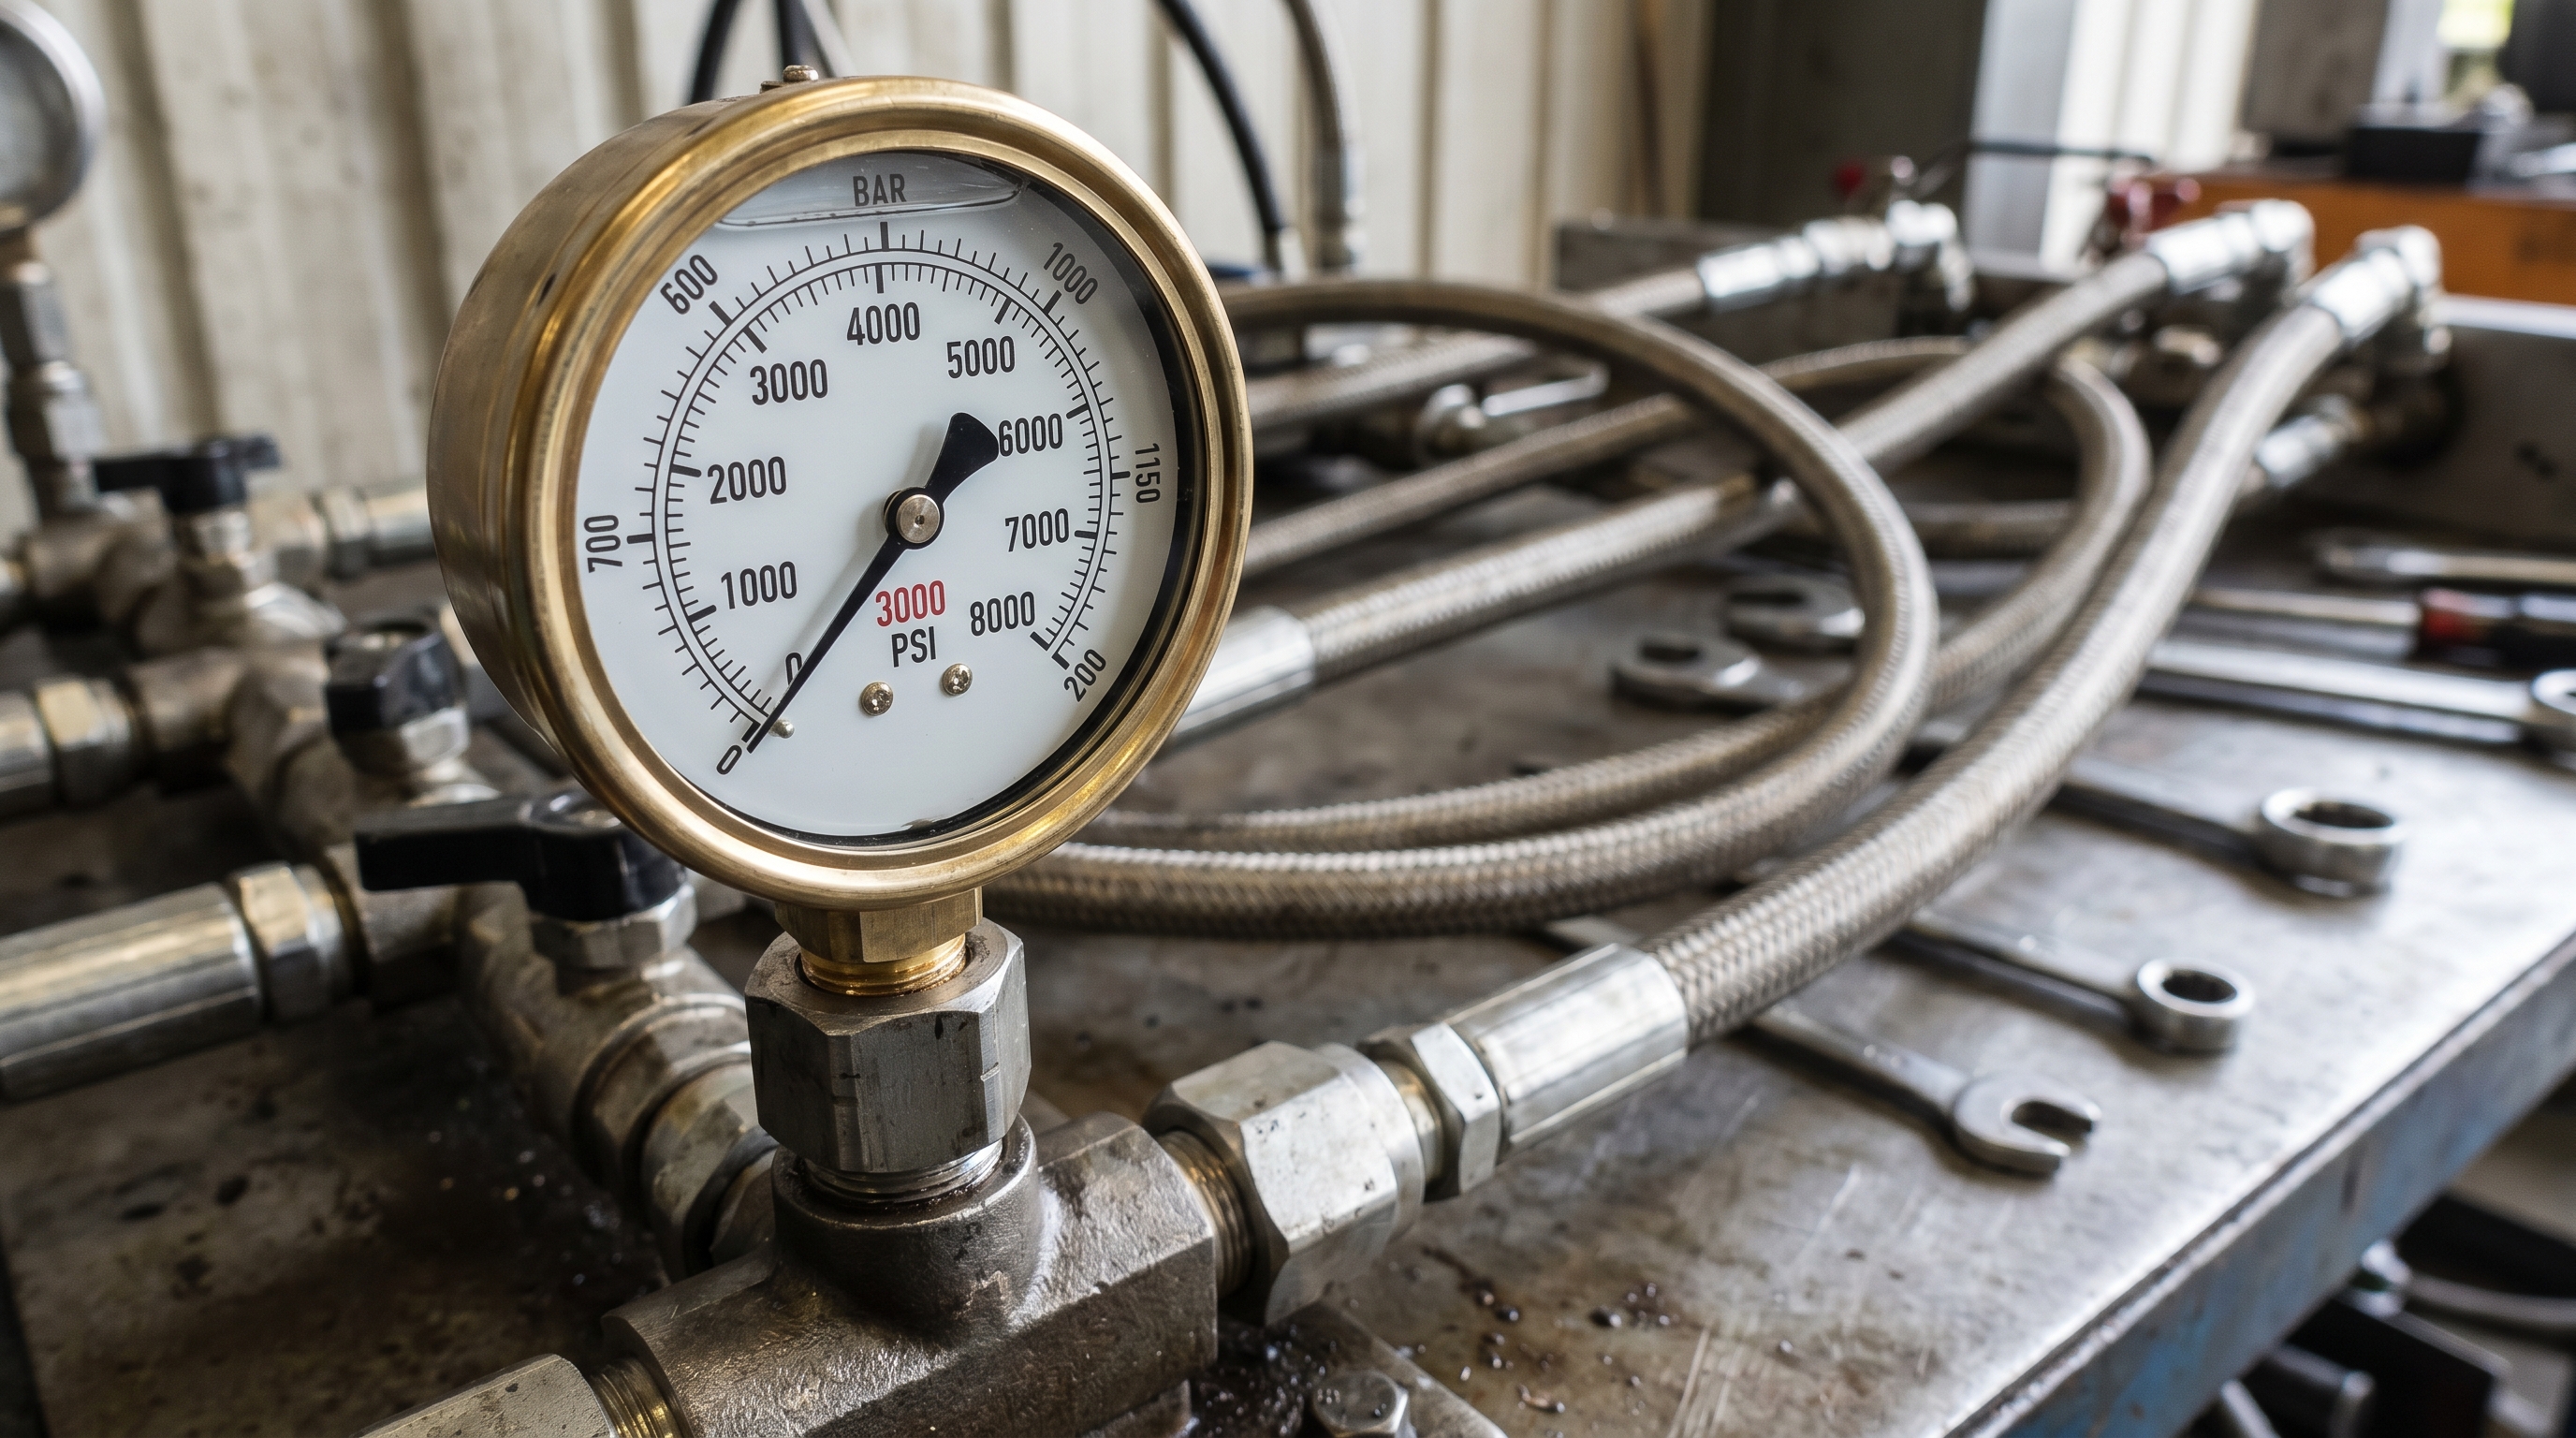
How Do You Conduct a Static Pressure Test?
Isolating the Cylinder for Accurate Measurement
To get a true reading of a cylinder’s internal health, you must remove the influence of the control valve. You do this by pressurizing the cylinder to its maximum rated capacity and then mechanically blocking the fluid flow.
Many technicians misdiagnose a leaking control valve as a faulty cylinder. You must use a high-pressure ball valve or a blanking plate to ensure you are only measuring the cylinder’s ability to hold oil.
- Port Isolation: Disconnect return lines to watch for bypass fluid.
- Mechanical Blocking: Use a gauge-in-line setup to monitor decay.
- Load Simulation: Ensure the test is performed at or near the 3000 PSI operating limit.
Monitoring Pressure Decay Over Time
Once the cylinder is isolated, you watch the gauge for any drop in pressure. A healthy cylinder should be able to hold its rated pressure for at least 5 to 10 minutes with zero visible decay on a standard analog gauge.
- Digital Precision: Use digital gauges for 0.1 PSI accuracy.
- Temperature Compensation: Account for pressure changes due to oil cooling.
- Baseline Comparison: Always compare results to the manufacturer’s original “new” spec.
Interpreting Gauge Fluctuations
Static pressure testing isn’t just about the final number; it’s about the speed of the drop. A rapid drop suggests a catastrophic seal blowout, while a slow “creep” suggests an O-ring that has hardened due to thermal fatigue.
- Vibration Analysis: Steady needles indicate a solid hydraulic lock.
- Rate of Change: Tracking PSI loss per minute provides a “health score.”
- Failure Mapping: Fast drops often correlate with damaged piston rings.
The analysis below correlates pressure loss percentages with the urgency of required maintenance interventions.
| PSI Drop (over 10 min) | Failure Category | Maintenance Action | |
|---|---|---|---|
| 0 – 10 PSI | Nominal | Continue Monitoring | |
| 11 – 100 PSI | Minor Leakage | Schedule Seal Kit Replacement | |
| 101 – 500 PSI | Moderate Bypass | Immediate Bench Inspection Required | |
| 501+ PSI | Critical Failure | Take Machine Out of Service Immediately |
What Visual Indicators Suggest Immediate Cylinder Failure?
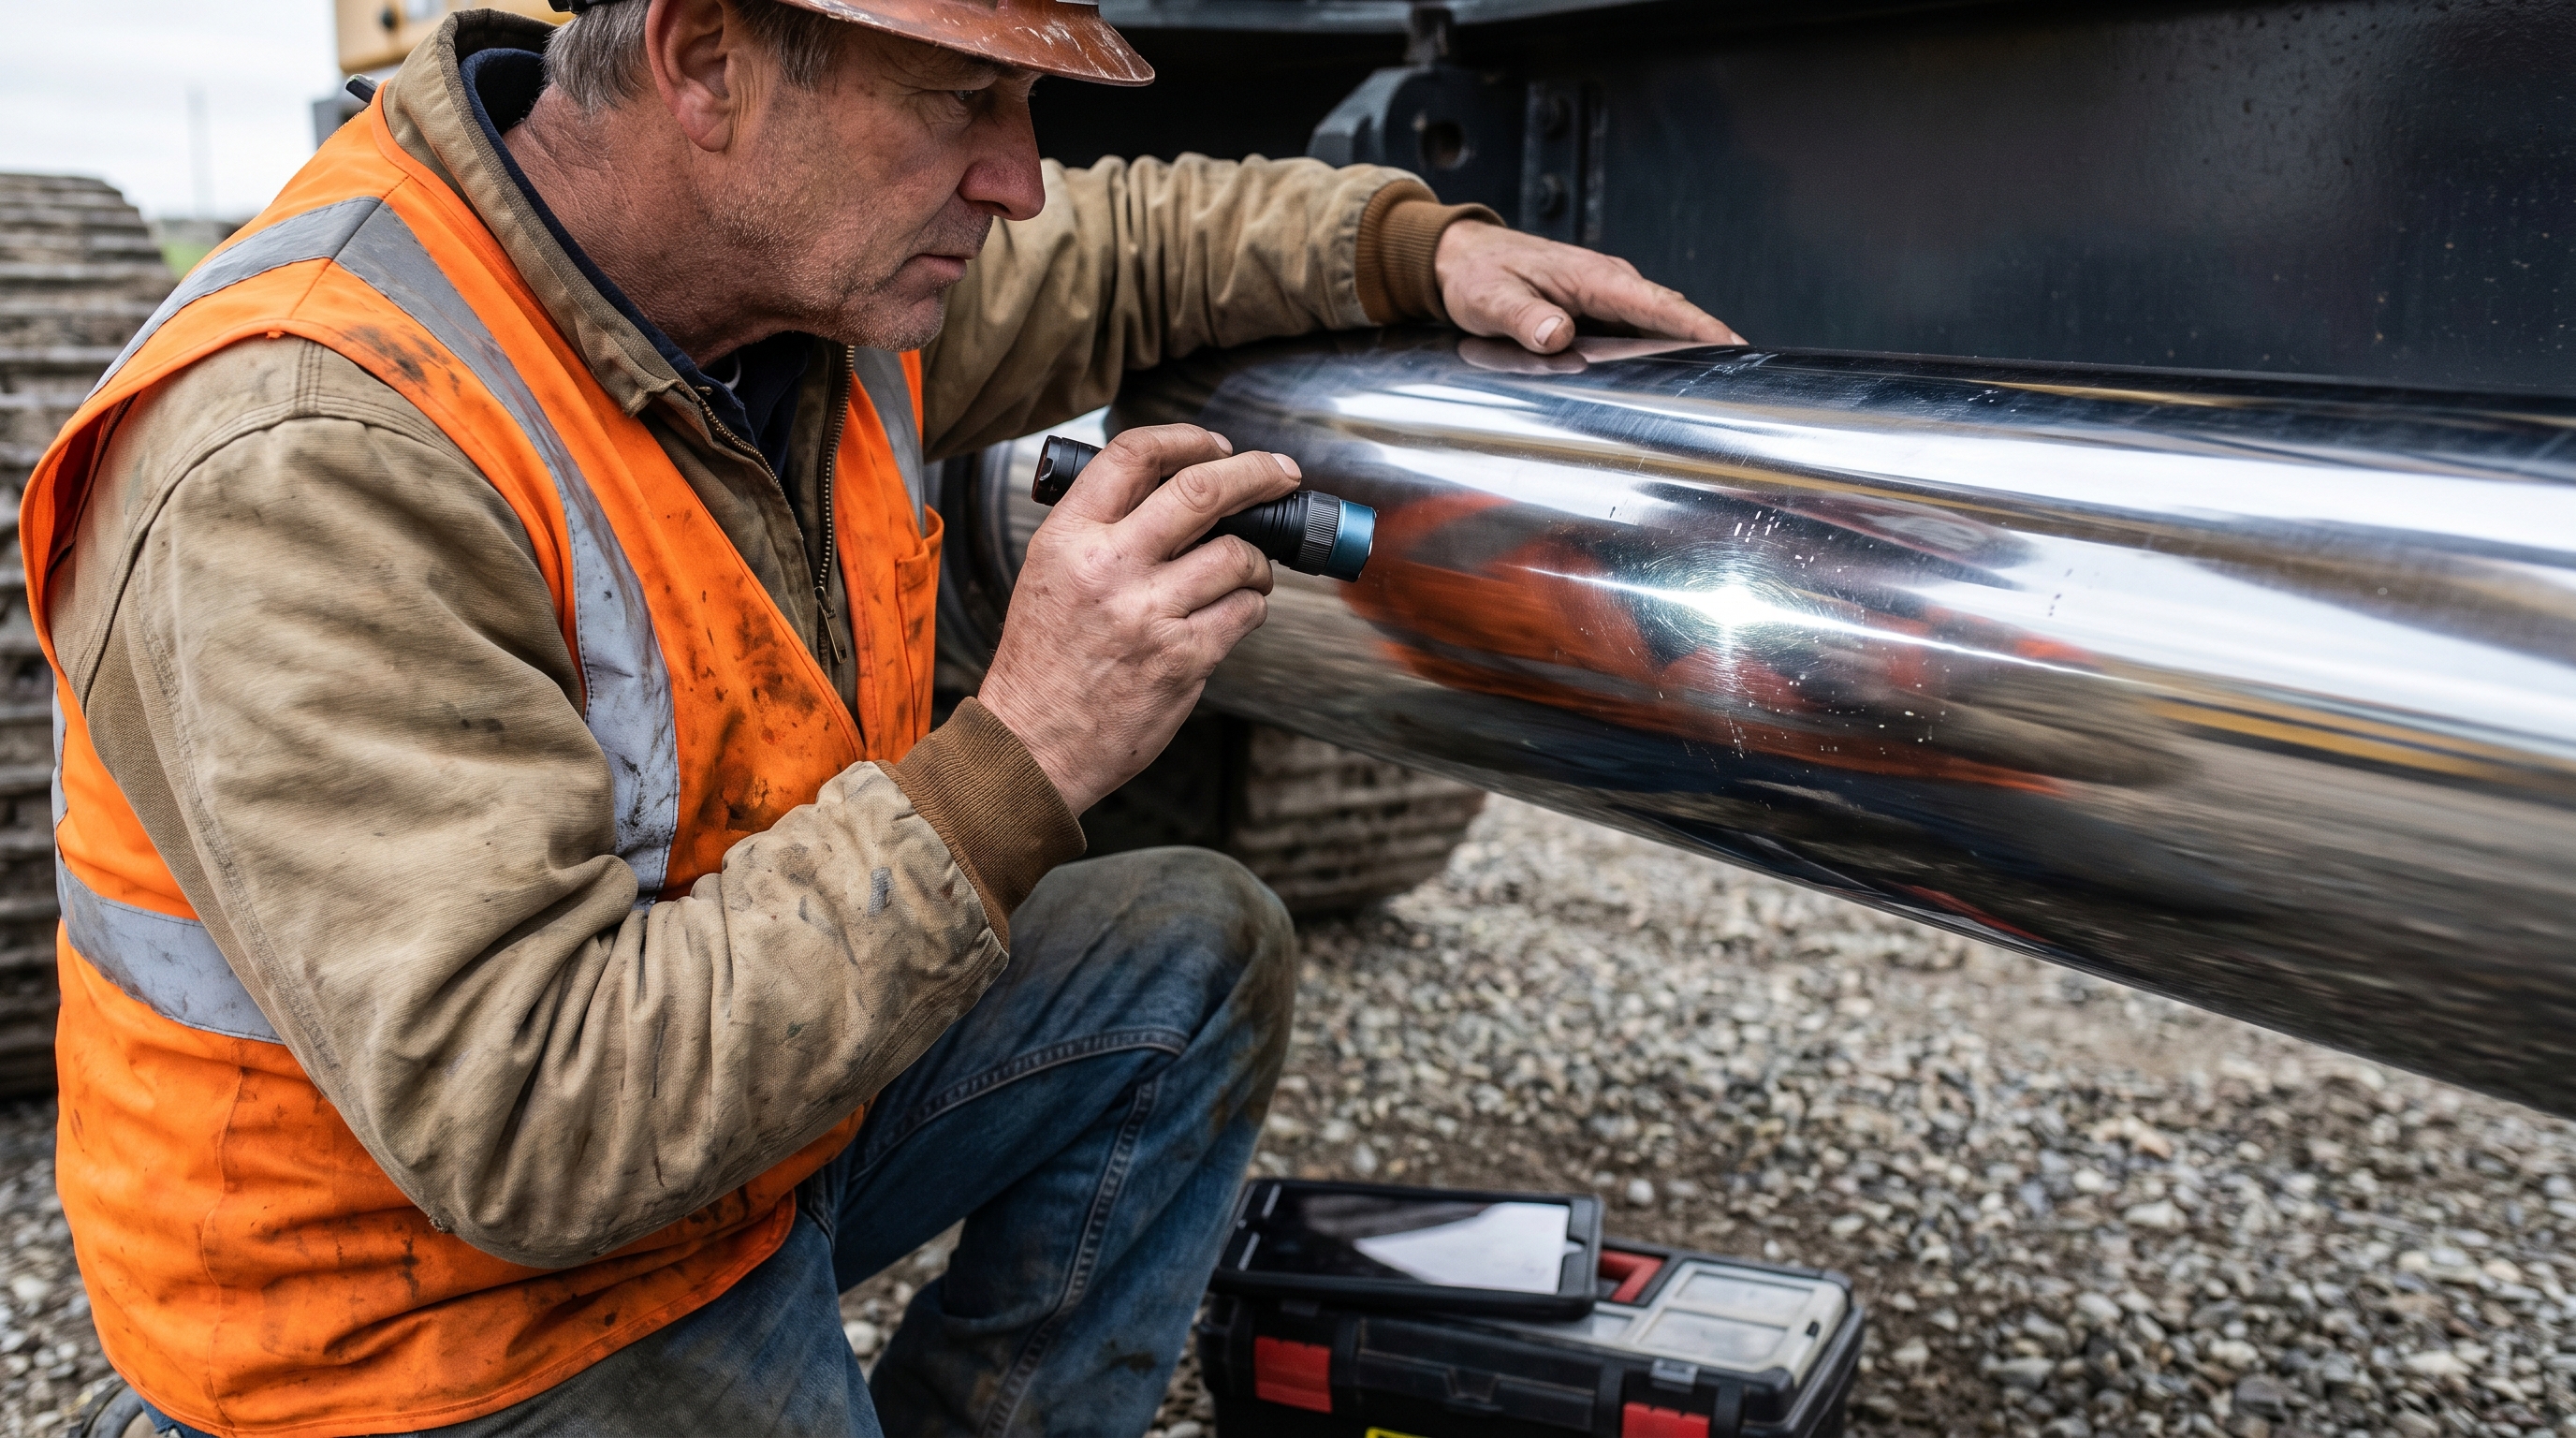
Inspecting for Rod Scoring and Pockmarks
The chrome rod is the most exposed part of your system. When you inspect a rod, you are looking for vertical scratches (scoring) or small pits (pockmarks) that can shred a new seal in minutes.
A pockmark is often caused by chemical corrosion or impact damage. If you feel a scratch with your fingernail, it is deep enough to carry oil past the wiper seal and introduce dirt into the system.
- Tactile Inspection: Use a clean glove to feel for surface irregularities.
- Visual Mapping: Note the location of scratches to determine if misalignment is occurring.
- Chrome Integrity: Check for “flaking” which indicates poor original plating.
Detecting Rod Discoloration and Overheating
If the rod appears blue, purple, or dark brown, the cylinder is running too hot. This usually means that the internal friction is excessive or the system relief valves are set too high.
Overheating doesn’t just damage the steel; it “cooks” the polyurethane seals. You will see that once a rod has been heat-cycled excessively, the seals become brittle and lose their elasticity.
- Thermal Mapping: Use an infrared thermometer during operation.
- Color Identification: Blueing indicates temperatures exceeding 500°F (260°C).
- Surface Varnish: Brown coating suggests oil oxidation and varnish buildup.
Verifying Alignment and Pin Wear
If a cylinder is not perfectly aligned with its load, the rod will push against one side of the gland. You can replace the seals ten times, but if the cylinder is crooked, they will fail every time. You must check the pivot pins and bushings for excessive play that allows the cylinder to “twist” under load.
- Bushing Clearance: Measure the gap between the pin and the housing.
- Shiny Spots: Look for polished areas on one side of the rod.
- Mounting Integrity: Inspect for cracked welds on the clevis or flange.
| Visual Defect | Engineering Root Cause | Risk Level | |
|---|---|---|---|
| Vertical Scoring | Contaminated Oil / Dirt | Moderate – Seal Failure Imminent | |
| Blue Discoloration | Excessive Friction / Heat | High – Total Seal Hardening | |
| Bent Rod | Mechanical Overload / Impact | Critical – Component Replacement | |
| Pitting/Corrosion | Salt/Chemical Exposure | Low to Moderate – Wiper Wear |
When Is a Cylinder Drift Test Mandatory?
Quantifying Piston Seal Bypass Rates
The drift test is the most practical way for you to measure internal bypass in a double-acting cylinder. By extending the rod, holding a load, and measuring the retraction over time, you can calculate exactly how much oil is leaking past the piston seal.
You are not looking for absolute zero, but rather staying within the manufacturer’s specified tolerance (e.g., 2mm per 24 hours).
- Standardized Loading: Perform the test with the same weight every time.
- Measurement Precision: Use a dial indicator or a caliper for millimeters.
- Time Boxing: Set a consistent window (e.g., 15 minutes) for the measurement.
Differentiating Between Valve and Seal Drift
A common mistake you might make is assuming that “drift” always means a bad cylinder. To prove it is the cylinder, you must bypass the control valve by using a manual lockout or a pilot-operated check valve.
If the cylinder still drifts when the ports are physically capped, the leak is internal to the hydraulic cylinders . If the drift stops when capped, your problem is in the control valve or the plumbing.
- Port Capping: The only definitive way to isolate the cylinder.
- Thermal Stabilization: Wait for the oil to reach a stable temperature before measuring.
- Orientation Control: Ensure the cylinder is in a vertical or inclined position.
Calculating the Volumetric Leak Rate
For advanced engineering analysis, you can convert the linear drift (mm) into a volumetric loss (ml). This tells you exactly how many milliliters of oil are bypassing the seal per minute.
A high volumetric leak rate indicates that the barrel itself may be “ballooned” or out-of-round. If you find that the drift increases significantly at the end of the stroke, the barrel is likely worn in that specific area.
- Bore Area Calculation:
- Drift Volume:
- Trend Analysis: Graph drift rates over six months to see the wear curve.
Analyze the drift limits below to determine if your machinery is operating within safe industrial tolerances.
| Cylinder Bore Size | Permissible Drift (mm / 10 min) | Alert Condition | |
|---|---|---|---|
| 50mm (2″) | < 0.5 mm | Optimal Health | |
| 100mm (4″) | < 1.0 mm | Acceptable Wear | |
| 200mm (8″) | < 2.0 mm | Schedule Maintenance | |
| Any Size | > 5.0 mm | Immediate Repair |
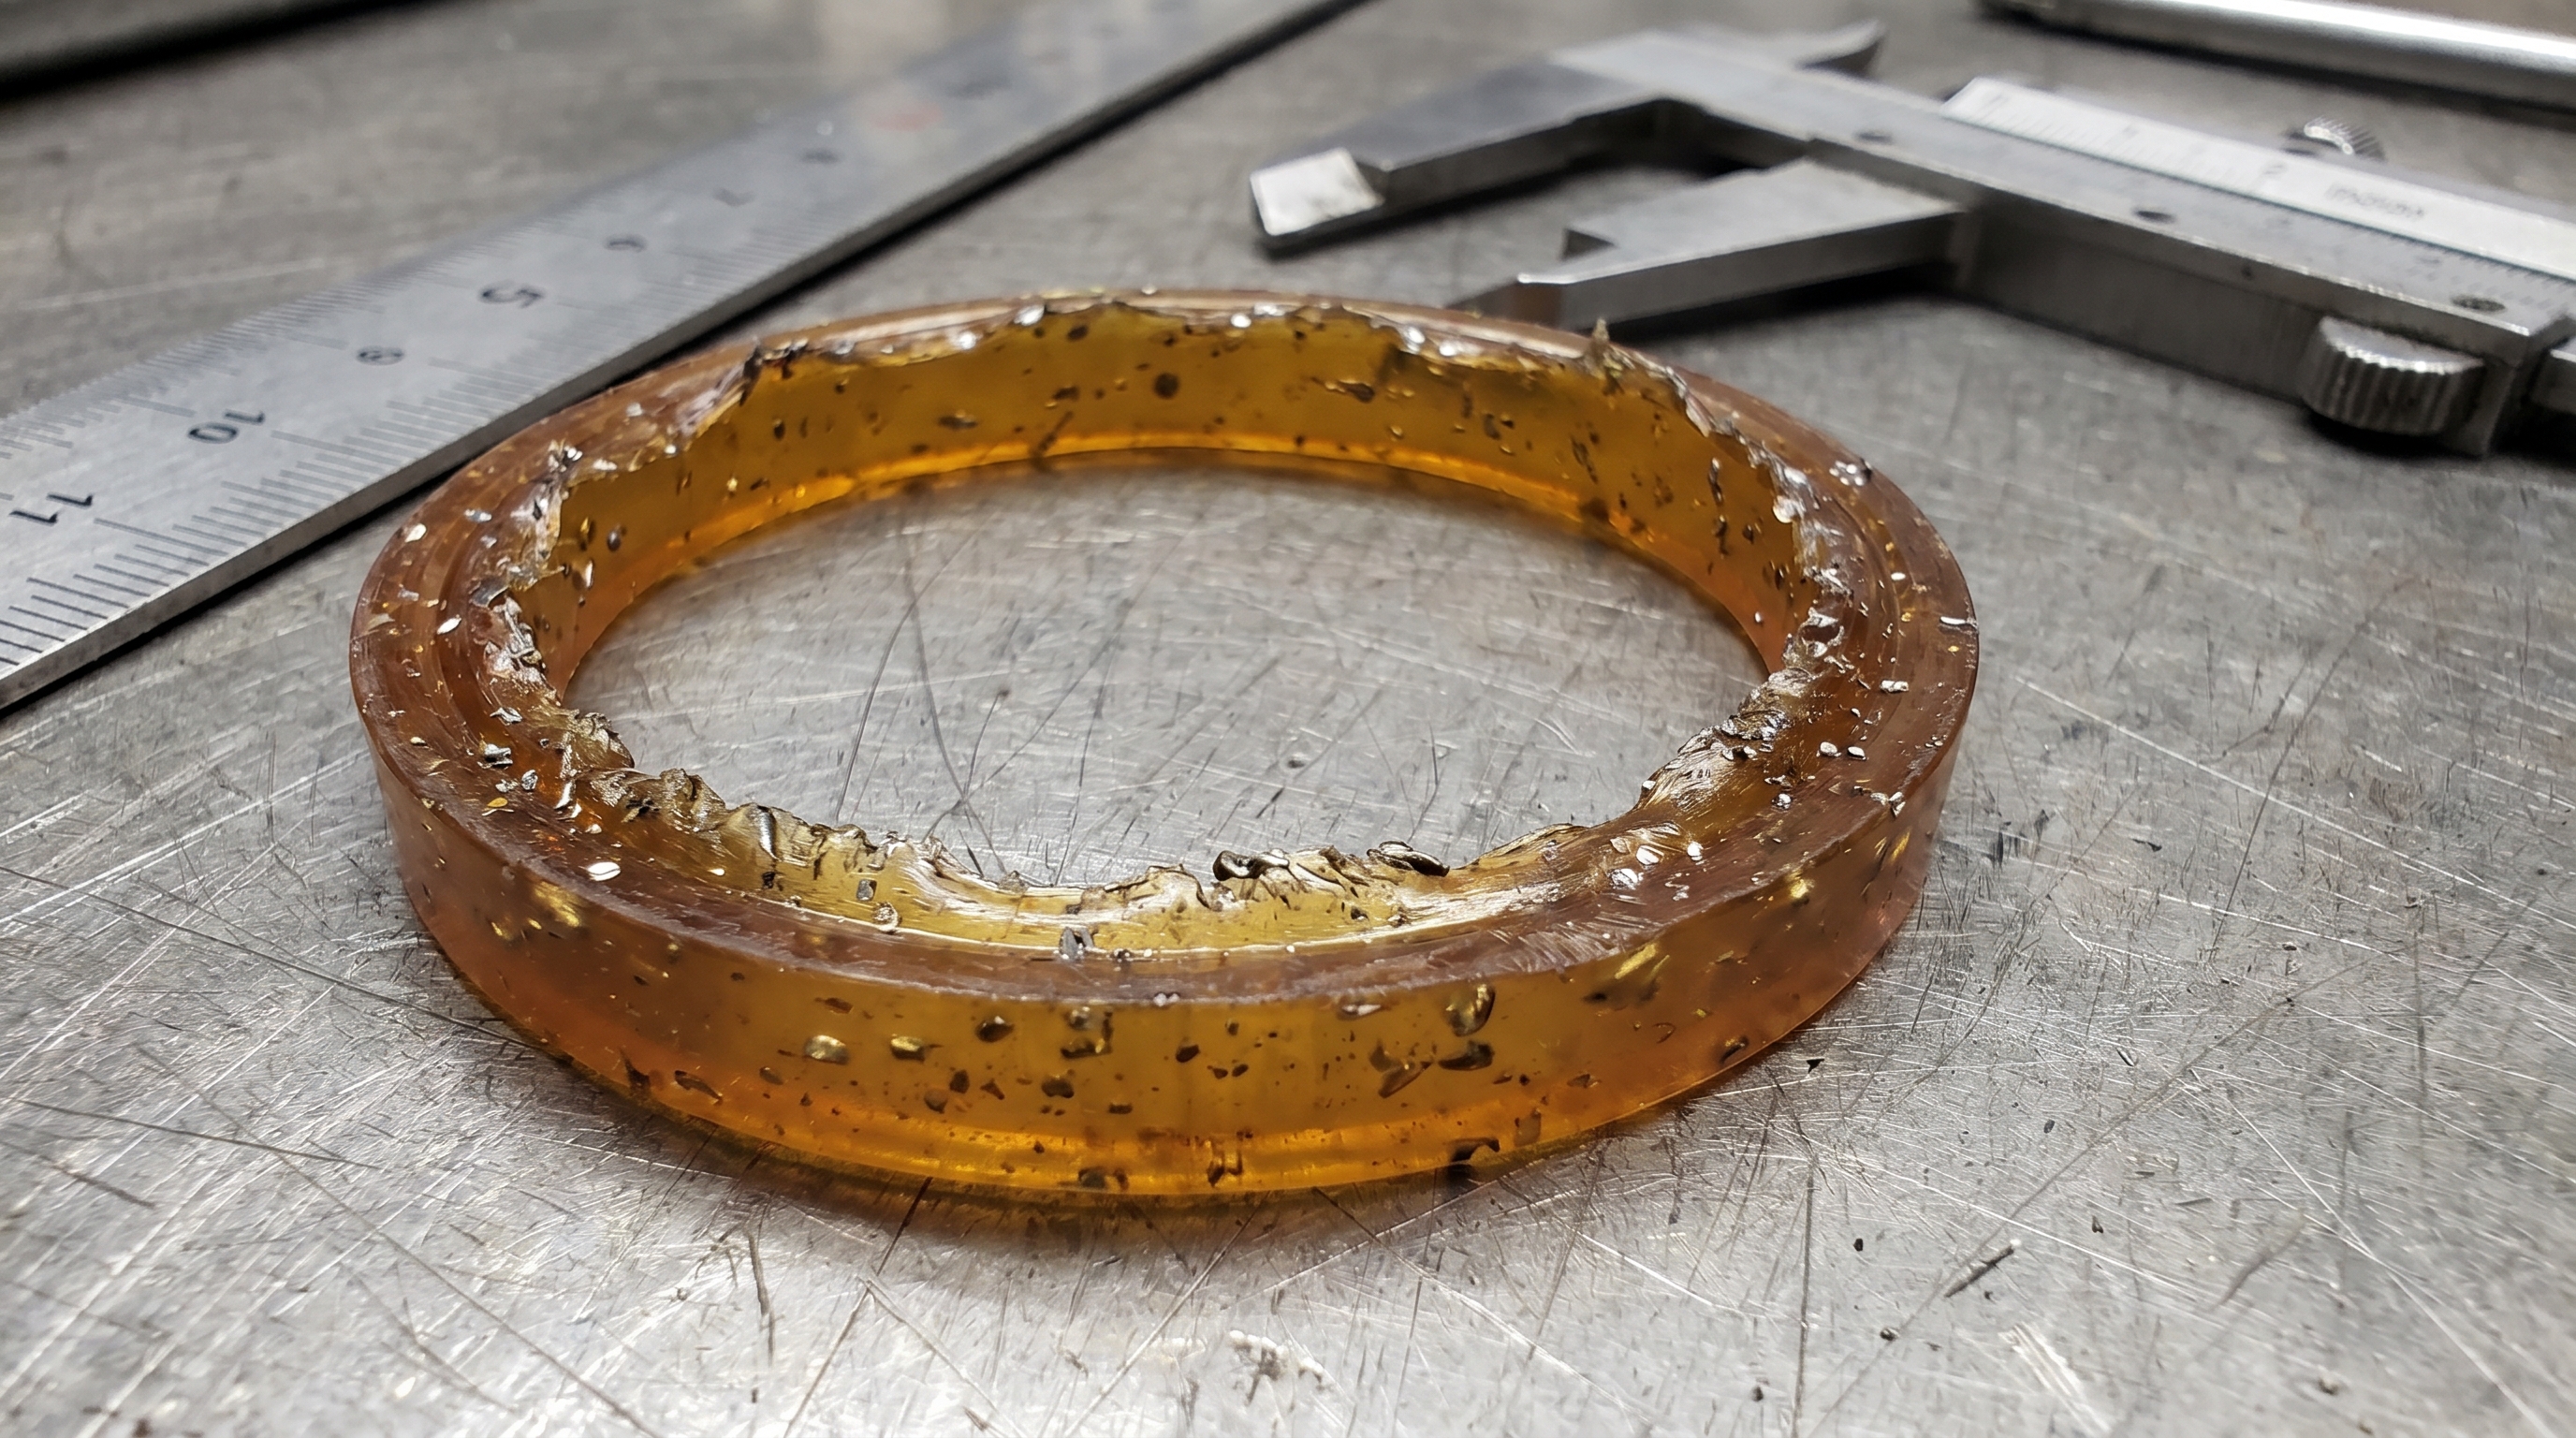
Why Do Internal Piston Seals Fail Prematurely?
Identifying Thermal Degradation Patterns
When you look at a failed seal under a magnifying glass, a “baked” or charred appearance indicates thermal distress. This happens when the cylinder operates beyond the temperature rating of the polyurethane (typically 230°F).
Localized heat can be much higher than the reservoir temperature. High-frequency “chatter” or vibration creates micro-friction that burns the seal material even if the overall system oil feels cool.
- Brittle Edges: A sign that the plasticizers have leached out of the seal.
- Color Change: Polyurethane turns from translucent to a muddy brown.
- Loss of Profile: The seal lip flattens out and can no longer “energize.”
Analyzing Contamination and Abrasion
If you see “nibbling” or small chunks missing from the seal lip, you have a contamination problem. Fine metal shavings or sand particles get trapped between the seal and the barrel, acting like sandpaper.
Most contamination enters through the rod wiper. If your wiper seal is cracked, you are effectively pumping dirt into the heart of your machine every time the rod retracts.
- Imbedded Particles: Shine a light on the seal to see if metal flakes are stuck in the material.
- Scoring Matching: If the seal is torn on one side, check the barrel for a corresponding scratch.
- Fluid Analysis: Perform a patch test on your oil to check for micron-level debris.
Understanding Seal Extrusion and Pressure Spikes
Extrusion happens when the seal material is pushed into the tiny gap between the piston and the barrel. This results in the “feathering” or “fringing” of the seal’s trailing edge.
Extrusion is often caused by a pressure spike that exceeds the design limits. If your system relief valve is slow to react, a sudden mechanical impact can send a 10,000 PSI shockwave through the cylinder, forcing the seal into the clearance gap.
- Gap Measurement: Check if the piston-to-bore clearance has increased due to wear.
- Hardness Testing: Use a Durometer to check if the seal is too soft for the pressure.
- Backup Rings: Verify if the anti-extrusion rings were installed correctly.
| Seal Appearance | Primary Cause | Solution | |
|---|---|---|---|
| Brittle/Hardened | Excessive Heat | Install Oil Cooler / High-Temp Seals | |
| Shredded/Nibbled | Contamination | Flush System / Replace Filters | |
| Extruded/Frayed | Over-Pressure | Adjust Relief Valves / Use Backup Rings | |
| Swollen/Soft | Chemical Incompatibility | Check Fluid-Seal Compatibility |
Can Ultrasonic Detection Find Hidden Internal Leaks?
Using High-Frequency Acoustics for Non-Invasive Testing
Ultrasonic testing allows you to “hear” a leak that is happening inside a steel barrel. When pressurized oil escapes through a tiny orifice (like a scratched piston seal), it creates turbulence that generates high-frequency sound waves.
- Non-Invasive: You don’t have to take the cylinder apart to find the problem.
- In-Situ Testing: Perform the test while the machine is running under normal load.
- Precision Pinpointing: Identify if the leak is at the piston, the rod seal, or a internal valve.
Training Your Ear for Turbulence Signals
A healthy cylinder moving through its stroke should have a consistent, low-level “white noise” signature. A leak sounds like a sharp “whistle” or a “crackling” sound that peaks at the point of failure.
- Baseline Recording: Record the sound of a brand-new cylinder for future comparison.
- Contact Probes: Use a needle-point probe to penetrate through paint and rust.
- Signal Strength: Most devices give you a decibel (dB) reading for objective tracking.
Overcoming Industrial Background Noise
One of the biggest advantages of ultrasonic technology is that it ignores low-frequency shop noise. You can find a leak while a nearby jackhammer is running because the device is only listening for high-frequency turbulence.
- Shielded Headsets: Blocks out ambient decibels for focus.
- Adjustable Frequency: Tune the device to the specific “sweet spot” for oil leaks.
- Data Logging: Save the dB levels to a maintenance software to track wear trends.
| Ultrasonic dB Reading | Turbulence Level | Estimated Bypass Flow | Interpretation | |
|---|---|---|---|---|
| 10 – 20 dB | Low | < 0.1 LPM | Healthy Cylinder | |
| 30 – 45 dB | Moderate | 0.5 – 1.5 LPM | Early-Stage Wear | |
| 50 – 70 dB | High | 2.0 – 5.0 LPM | Significant Seal Damage | |
| 80+ dB | Critical | > 5.0 LPM | Blown Piston Seal |
Conclusion
By mastering the hydraulic cylinder test protocols outlined in this guide, you have solved the three biggest hurdles in industrial fluid power: unpredictable downtime, runaway oil costs, and operator safety risks. You have learned how to use static pressure gauges to verify seal integrity, how to interpret ultrasonic signatures to find hidden bypasses, and how to use flow meters to quantify volumetric loss.
If your current components are consistently failing the tests outlined above, it is time to upgrade to precision-engineered hydraulic cylinders from a factory that understands your extreme working conditions.
Ready to eliminate unexpected failures from your facility? Talk with our team today for a technical consultation or a custom quote.
FAQ
Can I perform a pressure test without specialized tools?
You can perform a basic “drift test” using only a ruler and a stopwatch, but you won’t get the precise PSI data needed for advanced troubleshooting. For a professional-grade assessment, a high-quality pressure gauge and isolation valves are mandatory.
How do I know if my bypass is in the valve or the cylinder?
The only way to know is to “blank off” the cylinder ports; if the rod still moves under load when the oil has nowhere to go, the piston seal is bypassed. If the movement stops when blanked off, your leak is in the control valve or plumbing.
What’s the best way to clean a scored rod?
You can temporarily “stone” a small burr with a fine-grit abrasive stone to prevent it from cutting the seal, but this is a temporary fix. A truly scored rod requires professional grinding and hard-chrome replating to restore its original Ra finish.
How often should I perform an ultrasonic leak test?
For high-cycle industrial applications, we recommend a “walking inspection” once per month. For heavy construction or mining equipment, a quarterly check is sufficient unless you notice a drop in cycle speed or an increase in oil temperature.
Can a cylinder lose pressure without an external leak?
Yes, this is called an internal leak or “bypass” where the oil flows from the high-pressure side to the low-pressure side of the piston seal. You won’t see oil on the floor, but the cylinder will fail to hold its load and will generate excessive heat.