How to Remove Hydraulic Cylinder from Excavator
Introduction
In this comprehensive guide, we’ll delve into the art and science of removing hydraulic cylinders from excavators. We will introduce this complex process through a step-by-step approach. Ensuring that whether you’re an experienced mechanic or a curious hobbyist, you’ll have the knowledge you need to complete this task. Get ready to uncover the secrets of hydraulic cylinder removal and ensure your excavator continues to operate at peak performance.
Understanding Excavator Hydraulic Cylinders
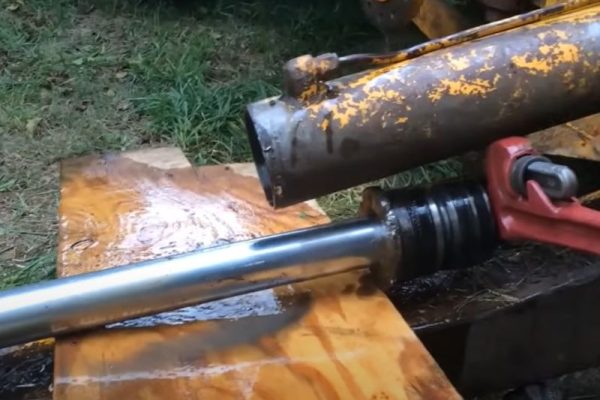
Hydraulic cylinders provide the power necessary to move and operate heavy machinery. In excavators, these cylinders play a key role in enabling the precise and powerful movements required for digging, lifting and bulldozing operations. Essentially, hydraulic cylinders convert hydraulic energy from hydraulic fluid into mechanical force to achieve controlled movement of the excavator’s boom, bucket and moving arm.
These hydraulic cylinders are relatively simple in design but highly efficient. They consist of a cylindrical barrel in which a piston connected to a piston rod moves back and forth. The motion is powered by a hydraulic fluid, usually oil, which is pumped into the cylinder chamber. When the hydraulic fluid enters the side of the piston, it pushes the piston to move, which in turn moves the piston rod, producing the motion needed to run the excavator.
Types of Excavator hydraulic cylinder
There are several types of hydraulic cylinders used in excavators, each with a specific function. The most common types include:
Double-Acting Cylinders: These are the most widely used in excavators. They allow for controlled movement in two directions, both extending and retracting, which is crucial for the varied tasks an excavator performs.
Telescopic Cylinders: Often used for providing extended reach, these cylinders have sections that extend like segments of a telescope, providing greater length than a standard cylinder.
Single-Acting Cylinders: These cylinders only allow movement in one direction. They are less common in excavators but can be used for specific functions where only a single motion is required.
Why Remove
The reasons for removing hydraulic cylinders from an excavator are as diverse as their applications. The most common reasons include:
Maintenance: Regular maintenance is essential for keeping the hydraulic cylinders and, by extension, the excavator in optimal working condition. This can involve cleaning, inspecting, and replacing worn parts.
Repair: Hydraulic cylinders are subject to wear and tear due to constant use and exposure to harsh environments. Repairs may be needed to address leaks, damaged seals, or worn piston rods.
Replacement: Over time and with extensive use, hydraulic cylinders may require complete replacement to ensure the excavator’s efficiency and safety.
Pre-Removal Preparations
Before embarking on the task of removing a hydraulic cylinder from an excavator, it is imperative to adhere to stringent safety measures and ensure all necessary tools and equipment are at hand. This preparatory phase is crucial, as it sets the stage for a smooth and hazard-free removal process.
Safety Measures and Precautions
Safety cannot be overstressed when dealing with heavy machinery. The first step is to ensure that the excavator is on stable, level ground to prevent any accidental movement. Operators should wear appropriate personal protective equipment (PPE), including hard hats, safety glasses, gloves, and steel-toed boots. It’s also vital to disconnect the battery to avoid any electrical mishaps and ensure that all personnel are clear from the machine’s range of movement.
Necessary Tools and Equipment
A successful hydraulic cylinder removal requires specific tools. Essential items include:
- Wrenches and sockets of various sizes for loosening bolts and nuts.
- A hydraulic jack and stands for supporting the excavator’s components during removal.
- A hoist or crane for handling the cylinder, especially in larger excavators where the cylinder is too heavy to move manually.
- Catch pans and containers for hydraulic fluid drainage.
- Cleaning supplies like rags and degreasers to manage spills.
Preparing the Excavator
Preparation of the excavator itself is a multi-step process:
Depressurizing the System: It’s crucial to relieve the hydraulic system of any pressure to prevent accidents. This is done by slowly and carefully operating the control levers after the engine has been shut off.
Positioning the Excavator: The boom and arm of the excavator should be positioned in such a way that the cylinder to be removed is easily accessible. This positioning should also take into consideration the need for a safe working area around the cylinder.
Draining the Hydraulic Fluid: Hydraulic fluid needs to be drained from the relevant part of the system to prevent spills and potential hazards during the removal process. This step also reduces the weight of the cylinder, making it easier to handle.

Step 1: Disconnecting the Hydraulic Lines
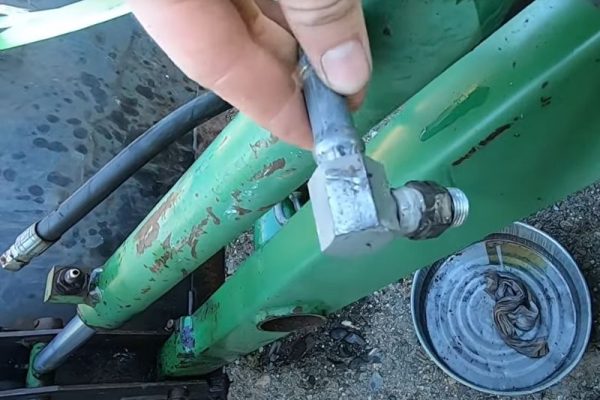
The first step in removing a hydraulic cylinder from an excavator is to disconnect the hydraulic lines. These lines are the lifelines that supply hydraulic fluid to the cylinder, enabling it to perform its functions.
Procedure:
- Start by identifying the hydraulic lines connected to the cylinder. These are usually distinguished by their robust, reinforced hoses or metal tubing.
- Before loosening the fittings, it’s essential to relieve any pressure in the system to avoid sudden spray or leakage of hydraulic fluid. This can be done by gently operating the excavator controls after the engine is off.
- With the pressure relieved, use the appropriate wrenches to loosen the fittings. This might require open-end wrenches or adjustable wrenches, depending on the excavator model.
- Gently twist and pull the lines away from the cylinder. If they don’t come off easily, check for any additional fasteners or clamps that might be holding them in place.
- As you remove each line, it’s crucial to label or mark them. This can be done using colored tapes or tags. Proper labeling ensures hassle-free reassembly as each line needs to be reconnected to its specific port.
Tips and Tricks:
- To prevent contamination of the hydraulic system, use line caps or plugs to seal the open ends of the disconnected lines. Contamination can lead to system failure, making this a critical step.
- In cases where the fittings are tight or corroded, spraying a bit of penetrating oil can help loosen them. Allow the oil to sit for a few minutes to break down the corrosion or seal.
- While removing the lines, be cautious of residual hydraulic fluid. It’s advisable to have a catch pan or cloth handy to manage any drips or spills. Remember, hydraulic fluid can be harmful to the environment, so it’s important to handle and dispose of it responsibly.
Step 2: Draining the Hydraulic Fluid
After successfully disconnecting the hydraulic lines, the next crucial step is to drain the hydraulic fluid from the cylinder. This step is fundamental not only for reducing the weight and handling ease of the cylinder but also for preventing any fluid spillage during the removal process.
Procedure:
- Position a catch basin or a suitable container under the cylinder. It’s important to choose a basin that’s large enough to hold all the fluid that will drain out, as hydraulic cylinders can contain a significant amount of fluid.
- Carefully tilt the cylinder to allow the hydraulic fluid to flow out. The cylinder should be tilted towards the port where the hydraulic lines were connected, as this is where the fluid will exit.
- Allow the fluid to drain completely. Depending on the size of the cylinder, this may take several minutes. It’s essential to be patient during this process to ensure all the fluid is removed.

Tips and Tricks:
- When tilting the cylinder, do it slowly and steadily. A gradual tilt helps control the flow of the fluid, minimizing the risk of splashing and creating a mess.
- Be prepared for the possibility that the fluid might be under some residual pressure, even after disconnecting the lines. This can cause the fluid to spray out initially when you start tilting the cylinder, so stand clear and ensure no one else is in the line of fire.
- In case of any spillage, have absorbent materials like rags or spill mats ready. Quick response to spills is key to a clean and safe workspace.
- After draining, it’s important to responsibly dispose of or recycle the hydraulic fluid. Hydraulic fluid can be environmentally hazardous, so check with local regulations on the proper disposal or recycling procedures.
Step 3: Removing Cylinder Mounting Pins
This step is crucial as it involves detaching the hydraulic cylinder from the excavator’s structural components, namely the arm and the boom. The cylinder is typically held in place by robust mounting pins, which need to be removed with care and precision.
Procedure:
- Begin by locating the mounting pins. These are usually found at the base of the cylinder where it connects to the arm and at the head where it attaches to the boom.
- Inspect the mechanism used to secure these pins in place. Commonly, you’ll find retaining bolts or cotter pins that lock the mounting pins.
- Using the appropriate tools, such as socket wrenches or pliers, carefully remove these retaining components. Keep these small parts in a secure place as they are essential for reassembly.
- Once the retainers are removed, gently slide out the mounting pins. In some cases, these pins may slide out easily, but in others, they might require a bit of coaxing due to their size and the weight they support.
Tips and Tricks:
- If you encounter resistance while trying to remove the pins, it’s likely due to rust or dirt accumulation. In such cases, apply a rust penetrant to the affected areas. Let it soak for a few minutes to loosen the grip.
- For stubborn pins, use a hammer to gently tap them out. Be cautious not to apply excessive force, which might damage the pins or the cylinder.
- Keep track of the orientation of the pins as they are removed. This will be helpful during reinstallation to ensure they are placed back in the correct direction.
Step 4: Detaching the Cylinder from the Excavator
This step is critical as it involves the physical removal of the hydraulic cylinder from the excavator. The cylinder, especially in larger excavators, can be quite heavy and cumbersome, necessitating the use of lifting equipment.
Procedure:
- With the mounting pins removed, the hydraulic cylinder is no longer anchored to the excavator’s arm or boom. It’s now ready to be detached.
- Assess the weight of the cylinder to determine the appropriate lifting method. For heavier cylinders, a hoist or crane will be necessary.
- Carefully attach the hoist or crane to the cylinder. This might involve wrapping chains or straps around the cylinder in a secure and balanced manner.
- Once securely attached, gradually lift the cylinder away from its mounting position. The lift should be slow and controlled to avoid any sudden movements or shifts in weight.
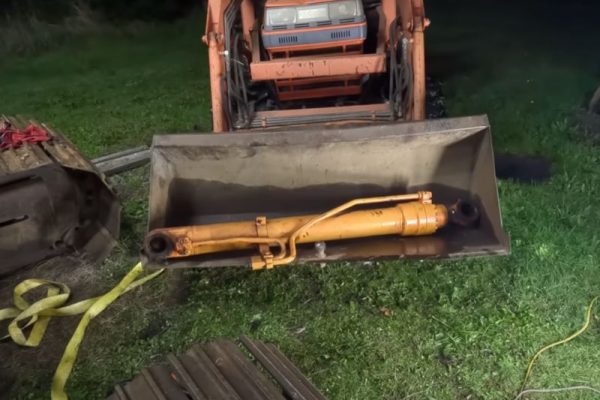
- Lower the cylinder gently to the ground or onto a waiting transport trolley. Ensure the area where you place the cylinder is level and stable.

Hints and Tips:
- Before using a lift or crane, make sure that its rated lifting capacity can support the weight of the cylinder. Using lifting equipment that cannot support the weight can lead to equipment failure and serious accidents.
- When securing cylinders with straps or chains, make sure they are intact and show no signs of wear or damage. Straps or chains should be positioned to ensure that the cylinder is balanced and will not tilt or slip during lifting.
Step 5: Handling and Storage of the Removed Cylinder
The final step in removing a hydraulic cylinder from an excavator involves the appropriate handling and storage of the removed component. This step is crucial to preserve the integrity of the cylinder while it’s out of operation, whether for short-term maintenance or long-term storage.
Procedure:
- After removing the cylinder from the excavator, transport it carefully to a designated storage area. This area should be clean, dry, and free from potential hazards that could cause damage to the cylinder.
- Place the cylinder in a stable position, ensuring that it won’t roll or fall. The surface should be flat and strong enough to support the cylinder’s weight.
- It’s advisable not to place the cylinder directly on the ground, especially on uneven or dirty surfaces. Instead, use wooden blocks or a pallet to elevate it off the ground, reducing the risk of moisture damage and dirt contamination.
Tips and Tricks:
- Store the cylinder in a horizontal position. This orientation helps in preventing any bending or warping of the piston rod, which is crucial for the smooth operation of the cylinder when reinstalled.
- Protect the ends of the cylinder, especially the ports and piston rod, from dust and debris. You can use clean caps or plugs for the ports and a soft cover for the rod.
- If you anticipate that the cylinder will be stored for a long period, it’s a good practice to apply a light coat of oil or a rust inhibitor on the piston rod. This helps in preventing rust and corrosion, which can significantly reduce the cylinder’s lifespan and efficiency.
- In case of extended storage, periodically check the condition of the cylinder. Look for signs of rust, corrosion, or any damage that might have occurred during storage. This proactive approach can save time and resources when it’s time to reinstall the cylinder.
Post-Removal Steps
Once the hydraulic cylinder has been successfully removed from the excavator, it’s essential to carry out a series of post-removal steps. These steps are critical in determining the next course of action – whether to repair or replace the cylinder – and ensuring that the cylinder or its replacement is ready for reinstallation.

Inspecting the Removed Hydraulic Cylinder
- Begin with a thorough visual inspection of the cylinder. Look for any signs of wear, damage, or corrosion, particularly on the piston rod and cylinder bore.
- Check for any bent or misshapen parts, as these can indicate underlying issues.
- Inspect the seals and gaskets for any signs of cracking or deterioration. Damaged seals are a common cause of cylinder failure and leaks.
- If equipped, check the condition of the bushings and bearings. Wear in these areas can affect the cylinder’s alignment and operation.
Deciding Between Repair and Replacement
- Assess the extent of any damage or wear. Minor issues like worn seals or slight corrosion can often be addressed through repairs.
- Consider the age and usage history of the cylinder. Older cylinders or those that have seen heavy use might be better candidates for replacement rather than repair.
- Evaluate the cost implications. Sometimes, the cost of repairing an older cylinder can be close to, or even exceed, the cost of a new replacement.
- Consult with a hydraulic specialist if you’re unsure. They can provide expert advice on the most cost-effective and reliable option.
Preparing the Cylinder or Its Replacement for Reinstallation
- If repairing, replace all worn-out parts, including seals and gaskets. Ensure that any repaired areas are clean and free from debris.
- For a new replacement cylinder, inspect it upon arrival to ensure it matches the specifications of the original and that there are no shipping damages.
- Apply a light coat of hydraulic fluid to the seals and piston rod. This helps in lubrication and ensures a smooth reinstallation process.
- If the cylinder has been in storage, conduct a quick check to confirm it’s still in good condition and hasn’t developed rust or other issues.
Conclusion
Whether you decide to repair or replace a hydraulic cylinder, the effort put into the process is a direct investment in the operational integrity of your excavator. It’s important to maintain a meticulous and detail-oriented attitude, which can greatly affect the performance and longevity of your hydraulic cylinders, and in turn, your excavator.
